Phil Rowley: Fly Craft Angling
Welcome Guest
Home
On-line Store
Whats New
Guided Fly Fishing
Seminars
Phils Articles
Entomology
Fly Patterns
• Archives
My Blog
Travel & Schools
Join/Become a Member
Partners
Members Section
Member Login
Members
Fly Fishing Tips
Fly Tying
Guest Writers
Contact Phil
Home
->Articles->
Fly Patterns
->
Archives
->
Getting the Skinny on Chironomids
Tweet
Fly Patterns
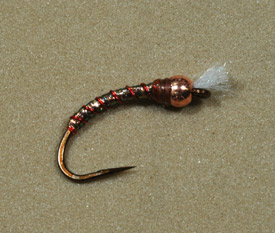
Getting the Skinny on Chironomids
The Copper Chromie
(Created By Ken Woodward)
To view the rest of this article, please login or
join now
for free!
Please Login
User Name:
Password:
Save my login
Tweet
© 2024 Phil Rowley: Fly Craft Angling
Website created and managed with
Tourism Website Builder
from
Interactive Broadcasting Corporation.